Monday, August 31, 2009

Back to School!


Yep, it's that time of year again!

I had every intention of baking up some yummy back to school recipes this weekend but that idea fell flat. Hopefully I'll be able to start tonight by making homemade poptarts (Carlee is allergic to the store bought ones). There are so many good recipes that I am dying to try!


Tuesday, August 25, 2009

Blueberry Muffins


This is one of Betty Crocker's tried and true recipes. A never fail classic muffin recipe that is a great addition to your breakfast table.

Betty Crocker's Blueberry Muffins

Ingredients:
3/4 cup milk
1/2 cup vegetable oil
1 egg
2 cups-all purpose flour
1/3 cup sugar
3 teaspoons baking powder
1 teaspoon salt
1 cup fresh or drained canned blueberries or 3/4 cup frozen blueberries, thawed and well drained*

Instructions:
Heat oven to 400 degrees. Grease muffin bottoms only of 12 medium muffin cups or line with paper baking cups. Beat milk, oil and egg. Stir in flour, sugar, baking powder and salt; all at once, just until flour is moistened (batter will be lumpy). Fold in blueberries. Divide batter among muffin cups. Sprinkle with sugar if desired. Bake until golden brown, 18 to 20 minutes. Immediately remove from pan. 1 dozen muffins; 195 calories per muffin.


*I used 3/4 cup frozen blueberries without thawing them and they turned out just fine.


Apple Crisp Muffins


If this muffin could talk it would be screaming "Help!" because everyone would be running to gobble it up. These were that good! A must try recipe that I adapted from gourmetmuffinrecipes.com How could you go wrong with something with apple crisp in the title?

Apple Crisp Muffins

Ingredients -

3/4 cup Milk
1/2 cup applesauce
1 Egg
2 cups Flour
1/3 cup Sugar
1 tsp baking powder
2 teaspoons Salt
1 medium Apple, pared and copped
1/2 teaspoon Cinnamon

Crisp:
2/3 cup Brown Sugar
1/2 cup Flour
1/2 cup Oats
1/3 cup Margarine
3/4 teaspoon Cinnamon

Preparation:

Heat oven to 400. Grease muffin pan.

Beat milk, applesauce and egg. Add apples. Stir in flour, sugar, baking powder, salt and cinnamon, all at once, until flour is moistened.

Divide into muffin tray.

Mix the crisp ingredients together, generously top each muffin with the crisp mixture. Bake about 18-20 minutes.


Pineapple Upside-Down Muffins


These aren't your usual run of the mill pineapple upside-down muffins. No, these are more adapted to be healthier and still be quite tasty. I found the recipe on eatingwell.com and they turned out great. Of course I left out the nuts and raisins for my picky eaters but I think they would have rocked with them left in!


Pineapple Upside-Down Muffins

Makes 1 dozen muffins

Ingredients:

Topping
2 tablespoons packed light brown sugar
2 tablespoons chopped walnuts or pecans (optional)
1 10-ounce can pineapple slices

Muffins
¾ cup whole-wheat flour
¾ cup all-purpose flour
2 teaspoons baking powder
½ teaspoon baking soda
¼ teaspoon salt
1 tablespoon ground cinnamon
2 large eggs
½ cup packed light brown sugar
¼ cup canola oil
2 tablespoons pineapple juice or orange juice
1 teaspoon vanilla extract
1 8-ounce can crushed pineapple (not drained)
1 cup grated carrot (1 large)
½ cup old-fashioned oats
¾ cup raisins, preferably baking raisins (see Ingredient note)
¼ cup chopped walnuts or pecans (optional)


Instructions:

1. Preheat oven to 400°F. Coat 12 muffin cups with cooking spray.
2. To prepare topping: Sprinkle 1/2 teaspoon brown sugar into each muffin cup. Sprinkle nuts, if using, over the sugar. Stack pineapple slices and cut into 6 wedges. Place 2 wedges in each muffin cup.
3. To prepare muffins: Whisk whole-wheat flour, all-purpose flour, baking powder, baking soda, salt and cinnamon in a large bowl.
4. Whisk eggs and brown sugar in a medium bowl until smooth. Whisk in oil, juice and vanilla. Stir in crushed pineapple. Make a well in the dry ingredients; add the wet ingredients and stir with a rubber spatula until just combined. Stir in carrot, oats, raisins and nuts, if using. Scoop the batter into the prepared muffin cups (they'll be quite full).
5. Bake the muffins until the tops are golden brown and firm to the touch, 15 to 25 minutes. Immediately loosen edges and turn muffins out onto a baking sheet. Restore any stray pineapple pieces and nuts. Let cool for at least 10 minutes. Serve upside-down, either warm or at room temperature.


Tips:

Ingredient Note: Baking raisins, moister than regular ones, ensure a better texture. To substitute regular raisins, plump them first: soak in boiling water for 10 minutes; drain well.
eating well Pineapple Upside-Down Muffins Tips Cont.


Nutrition Information:

Per muffin: 211 calories; 6 g fat (1 g sat, 3 g mono); 35 mg cholesterol; 36 g carbohydrate; 4 g protein; 3 g fiber; 185 mg sodium.


Jelly-Filled Muffins


The instant I saw this recipe on allrecipes.com I knew I had to try it. This was by far my favorite muffin that we brought along for a quick camping breakfast treat. I used plum jelly and it was perfect! I will have to make these again next year. And the year after that, and the year after that, and the year after that...

Jelly Filled Muffins

INGREDIENTS

* 1 1/2 cups all-purpose flour
* 1/2 cup sugar
* 2 teaspoons baking powder
* 1/4 teaspoon salt
* 1/4 teaspoon ground nutmeg
* 1 egg
* 1/2 cup milk
* 1/3 cup butter or margarine, melted
* 1/2 teaspoon vanilla extract
* 1/4 cup strawberry or plum jelly

* TOPPING:
* 3 tablespoons butter or margarine, melted
* 1/3 cup sugar
* 1/2 teaspoon ground cinnamon


DIRECTIONS

1. In a bowl, combine the first five ingredients. In another bowl, whisk the egg, milk, butter and vanilla. Stir into dry ingredients just until moistened. Spoon half of the batter into 12 greased or paper-lined muffin cups. Spoon 1 teaspoon jelly in center of each. Fill muffin cups two-thirds full with remaining batter. Bake at 400 degrees F for 20 minutes or until a toothpick inserted 1 in. from the edge comes out clean. Cool for 5 minutes before removing from pan to a wire rack. Brush tops with butter. Combine sugar and cinnamon; dip tops of muffins in mixture. Serve warm. Makes 12 servings.


Tuesday, August 18, 2009

Oops

Actually I don't think I'll be able to post the recipes until I get back from Utah. Too busy, busy!! The muffins were a hit by the campfire in the morning though!


Thursday, August 13, 2009

Campin' Muffins!

Hey everybody! I'm heading to the mountains and taking some sweet muffins with me. When I get back I'll post the recipes but for now you can salivate over these pictures!


Tuesday, August 4, 2009

Biscuit Pizza Pockets

What do you do when you have leftover pizza ingredients and yet don't want to go through the work of making an actual pizza? Make pizza pockets ofcourse! At least, that's what I thought of when I perused the fridge and saw a can of biscuits just sitting there waiting to be devoured. This is a quick and family friendly recipe. Feel free to mix and match the toppings, or should I say the innards?
Roll out biscuit dough one at a time.


Spoon 2 tsp. sauce into center.


Sprinkle 2 T. cheese onto sauce.


Top with 4 slices of pepperoni or meat of choice.


Fold in half and seal edges by pressing together with a fork.
Cut two slits into top for ventilation.


Place onto greased cookie sheet and bake for 15-20 minutes in a 350 degree oven. Ummm...smell that pizza wannabe aroma! Enjoy!


Biscuit Pizza Pockets


Ingredients:
1 can Pillsbury Grands Buttermilk biscuits (8ct)
Pizza sauce (2 tsp. per biscuit)
Approximately 1 cup shredded pizza cheese (2 T per biscuit)
32 Slices Pepperoni (4 per biscuit)

Directions:
Preheat oven to 350 degrees. Taking one biscuit at a time, roll out biscuit dough to desired size. Spoon 2 teaspoons of pizza sauce into the center of circle; do not spread sauce to edges. Top with 2 tablespoons cheese. Place 4 pepperoni slices on top of cheese. Fold biscuit in half and seal edges by pressing edges together with a fork. Cut two slits on top for venting. Repeat with remaining biscuits. Place onto greased cookie sheet at least 4 inches apart. Bake for 15-20 minutes or until biscuit is lightly browned.


Monday, August 3, 2009

Pokemon Cake Lollipops

Photobucket


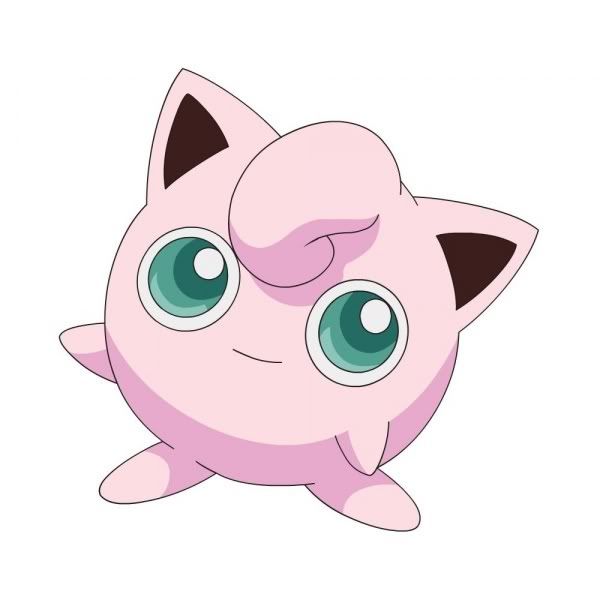
Why hello there Jigglypuff and Pikachu!
Welcome to Collin's party!

jigglypuff Pictures, Images and Photospikachu Pictures, Images and Photos


I have no idea how Collin came to love Pokemon so much but he does. So I tried to center my goodies for his party around them.

Photobucket

You've probably seen cake lollipops all over the internet. I've made cake balls before but I haven't perfected the whole cake on a stick thing. This was my first attempt at making some Pokemon lollipops for my son's party. We made his favorite Pokemon which is Pikachu. We also made some pink Jigglypuff characters for the girls. I was hoping that my little guys would be cuter than this but I just could not get the candy melts to stay smooth. Plus my edible decorating pens would NOT write on candy melts. Sigh. Oh well, at least I eventually got them to write enough to sort of make out Pikachu's face. On the plus side though the kids loved them! That's all that matters right? Someday I'll get better at this but you've got to start somewhere...


Photobucket

INGREDIENTS:
1 box cake mix, your choice of flavor! (cook as directed on box for 13 X 9 cake)
1 can vanilla frosting (16 oz.)
1/2 - 3/4 package yellow candy melts
1/2 - 3/4 package pink candy melts
Edible decorating pens
assorted candy decorations (For Pikachu: I pre-cut yellow fondant into ears and let dry overnight. Use the black pen to decorate tips black. I also used red hots for his cheeks. For Jigglypuff I used mini green M&M's for the eyes. I then melted a few pieces of pink candy melts and freehanded ears and let dry on waxed paper. The whites of his eyes are white decorating frosting.)


DIRECTIONS:
1. After cake is cooked and cooled completely, crumble into large bowl.
2. Mix thoroughly with 1 can vanilla frosting. I ended up using only 3/4 of the can of frosting and it was plenty.
3. Roll mixture into quarter size balls and lay on cookie sheet. (Should make 45-50 depending on how big you make the balls.) I used my tablespoon to measure out the dough or use a mini ice-cream scoop.
4. Chill for several hours. You can speed this up by putting in the freezer. (Easy make ahead step-Stick them in the freezer overnight to be ready to dip the next day.)
5. I took the cake balls out one at a time and re-rolled them in my hand to make them smoother and inserted a lollipop stick. Return to freezer.
6. Melt candy melts in microwave per directions on package or on a double broiler. Make sure you have decorations out and ready that you want to attach to the cake ball before it is completely cooled. For Pikachu I used red hots for his cheeks and cut ears out of yellow fondant the night before. The ears need to be prepared far in advance so they are dry and firm enough to handle. For Jigglypuff I used green mini M&M's for his eyes and pink candy melts for his ears.
7. Roll balls in candy melts one at a time (Use a spoon to dip and roll in candy melts and then tap off extra.) If using microwave directions melt a few pieces of candy melts at a time before it starts to cool and thicken. It's easier to work with when it's hot. Add decorations and lay on wax paper until firm.
8. Cake balls are ready for final decorations in only a few short minutes. I drew on their faces with a black decorating pen. I added a tiny dot of white icing on Jigglypuff's green eyes and a little tuft on his head that must be his hair? Not really sure!


Photobucket

Happy Jiggly's!


Photobucket
Happy Birthday Collin!!