Friday, July 31, 2009

Pokeball Cookies


Just thought I would share a picture of the pokeball sugar cookies I made for my son's birthday. I used my mom's secret frosting recipe for the white and red frosting. The rest is fondant pieces that I cut out. It was one of those labor of love projects because it took forever to complete only a dozen cookies. Oh well, Collin sure enjoyed them!


Tuesday, July 28, 2009

Chocolate Ice Cream Cake

I love ice cream cake but I've never attempted to make one before. My father in law isn't a huge frosting fan so my mother and I decided to make him an ice cream concoction. My mom has made a few before but this was my first time. It's kind of a long process but definitely worth the effort!


What's nice about ice cream cake is that you can mix and match any kind of flavor combination you want. Let your cravings run wild!

We used the following as ingredients:

1 jar hot fudge topping
2 cans Dulce de Leche
2 10-inch baked rounds chocolate cake
1/2 gallon vanilla ice cream
whipped cream

1. Cut each cake round in half with sharp knife. Place bottom half of one cake round into a springform pan.

2. Spread one can Dulce de Leche over top of cake layer.

3. Cover with top half of cake round.

4. Soften vanilla ice cream. May microwave in 5 second intervals if needed.


5. Smooth half of ice cream over cake layer.


6. Freeze for at least 30 minutes.

7. Pour your ooey gooey chocolate fudge over ice cream. I heated it in the microwave to see if it would spread easier but it ended up being a chocolatey mess! Oh well, it still tasted good. That's all that counts right? I think next time I'll just spread it on the actual cake piece and forget about trying to get it to adhere to the ice cream.


8. Freeze for at least another 30 minutes.

9. Smooth remaining ice cream over fudge layer.

10. Cover with bottom half of second cake round. Top with can of Dulce de Leche.

11. Follow with top of second cake round and smooth sides with a metal spatula. Freeze for a good hour or so. Meanwhile make up your whipped cream or soften 2 small tubs of Cool Whip. Now you are ready to decorate!
12. We put the whipped cream in a piping bag and quickly decorated the sides with an up and down motion. You can also smooth it on the sides with a small metal spatula, but you need to work fast! Put cake bake in freezer for 15-30 minutes then spread remaining whipped cream on top of cake. Put cake back into freezer until ready to serve.

We added cute chocolate tools on top right before we cut the cake. Aren't they cute!

Yum!

My father in law loved it. He even added his name on my calendar for two more birthdays this month. I think he was wanting another cake!


Wednesday, July 22, 2009

Collin's Dinner

The other night my sweet little boy Collin wanted to make dinner. What did he want? Pork chops baby! We got out our spices and he got to work.

At first he wanted to go and change because he didn't want to be photographed in his pajamas. What's wrong with cooking in your P.J.'s? I can't believe how embarrassed he gets at little things these days. Anyways he helped me measure out the spices into a sandwich bag.

Then he shook it all up. I think that was his favorite part.

He placed them on the broiler pan and then we put it in the oven and waited until it smelled so yummy we couldn't stand it anymore and had to get it out of the oven.

Here's the end result. Do you know what Collin said as he was eating them?
He said, "Mom do you know why these pork chops are so good?"
I said, "Why?"
"Because I made them!"
Silly boy.

Collin's Pork Chops
Ingredients:
2 T yellow cornmeal
2 T whole wheat flour
1 tsp salt
1/2 tsp sugar
1/2 tsp onion powder
1/2 tsp paprika
1/2 tsp garlic powder
1/2 tsp garlic pepper grinders
3-4 medium sized pork chops

Directions:
Preheat oven to 425 degrees. Measure ingredients into a plastic sandwich bag. Place one pork chop at a time into the bag and shake until covered. (May dredge in milk first if spices don't want to stick.) Bake for 30 to 35 minutes.


Collin also had to make chocolate pudding for dessert. Who was I to complain?

His sissy was especially grateful!
Thanks for cooking Collin. I love it when someone else does the work!


Thursday, July 16, 2009

"Swirls Gone Wild" Cheesecake brownies

I'm always up for a good eggless brownie recipe so when I saw this one I knew I had to try it!This recipe is taken directly from the new Hungry Girl 200 under 200 Recipe book. There are so many yummy sounding recipes. They are also low-cal and delicious!

Ingredients:

One 18.25-ounce box devils's food cake mix
One 15-ounce can pure pumpkin
6 ounces fat-free cream cheese, room temperature
1/4 cup Splenda No Calorie Sweetener (granulated)
1 teaspoon Coffee-Mate Sugar Free French Vanilla powdered creamer*
1/4 teaspoon vanilla extract

Directions:

Preheat oven to 400 degrees.

In a large mixing bowl, combine cake mix and pumpkin, stirring until completely blended. Batter will be very thick.

Spray a large baking pan (about 9 inches by 13 inches) with nonstick spray. Spread batter into the pan and set aside.

Place powdered creamer in a medium mixing bowl. Add 2 tablespoons warm water and stir until creamer has dissolved. Add cream cheese, Splenda, and vanilla extract. Using a whisk, mix vigorously until completely blended, smooth, and lump-free.

Spoon cheesy mixture over the brownie batter and use a knife to swirl it in. Don't worry if your swirl isn't perfect-your brownies will taste delicious no matter what!

Bake in the oven for 20 to 25 minutes, until a knife inserted into the center comes out clean. Allow brownies to cool completely. Cut into sixteen pieces. Enjoy!

Makes 16 servings.

PER SERVING (1 brownie): 133 calories, 1.75g fat, 312mg sodium, 29g carbs, 1.5g fiber, 7.5g sugars, 3g protein.


(I'm loving my new brownie c utter! It makes them look so cute!)

* I didn't have any creamer so I just used 1 teaspoon of vanilla instead. It was still yummy!


Wednesday, July 15, 2009

Multi-Bean Salsa

Okay, so last night I was looking at my sorry excuse for cooked tortillas and I didn't want them to go to waste! I must have over-cooked them because they were too hard to roll into burritos. Then I got an epiphany. Why not chop them up and use them with salsa? Then my brain started rolling some more and I started throwing cans out of my pantry that could be used for salsa. The recipe below is what I came up with. It was actually very yummy even though I bet no one else in my family will eat it!


Multi-Bean Salsa

Ingredients:
1 15.25 oz. can whole kernel corn-drained
1 15 oz. can kidney beans-rinsed and drained
1 15 oz. can black beans-rinsed and drained
1 14.5 oz. can diced tomatoes with chilies-drained
1/4 cup mild salsa

Directions:
Toss ingredients together in a medium-sized bowl. Serve with chips (or in my case tortillas chopped into triangles). Enjoy!


Friday, July 10, 2009

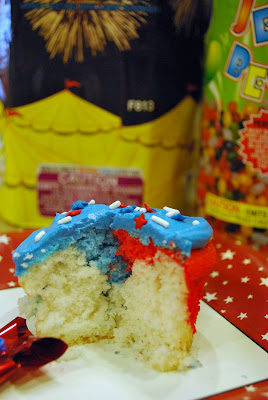
Fourth of July Cupcakes

Who doesn't like cupcakes? They are the perfect size of cakey goodness. My cousin and I wanted to make some fourth of July cupcakes so we could use the adorable pinwheels and cupcake wrappers I bought. She has never made tri-color cupcakes so we decided to have a little bit of coloring fun. They turned out very patriotic!

Ingredients:

1 box white cake mix plus ingredients listed on box
Red and blue food coloring

Directions:

Pre-heat oven to 350 degrees. Prepare cake mix according to directions on box. Separate dough into three medium sized bowls. Tint one bowl red, one blue, and leave the other white. Line cupcake pans with paper liners. Start dropping one spoonful of dough in alternating colors into each cupcake paper until about 3/4 full.


Bake according to package directions.


Remove cupcakes from pan and allow to cool completely. Frost using icing recipe below or by tinting store bought frosting. Decorate and enjoy!

Betty Crocker's Creamy Vanilla Frosting:
3 cups powdered sugar
1/3 cup margarine or butter, softened
1 1/2 teaspoons vanilla
about 2 T milk

Mix powdered sugar and margarine. Stir in vanilla and milk; beat until smooth and of spreading consistency. Frosts a 13x9-inch cake or fills and frosts two 8-or 9-inch layers. 15 servings. 140 calories per serving.


Sunday, July 5, 2009

Raspberry Peach Cobbler

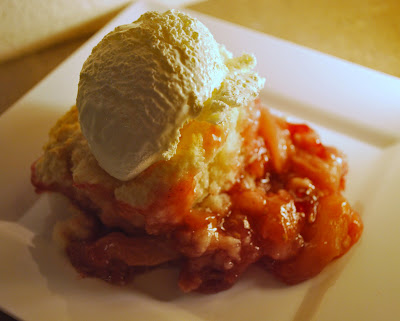
Don't you just love cobbler! I had fresh peaches and raspberries so I decided to throw them together into one yummy cobbler. It was such a tantalizing aroma as it was cooking and I didn't even wait for it to cool down before I was snarfing it down.

Don't these peaches look good! Loved 'em!


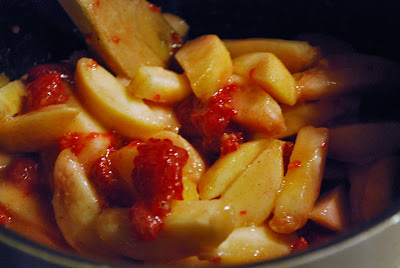
I cut those beauties up (plus a couple of their peach buddies) and mixed them with the raspberries. Even smelling them cooking on the stove top was heavenly!


The poor beautiful raspberries got turned into mush though the more I stirred. That's alright though because they infused their deliciousness into the peaches!


I never make pretty little balls on top for the dough. I'm always in too much of a hurry to get it into the oven!


Ummmmmmm, yummy! Enjoy the recipe below.
I adapted it from one of good ol' Betty Crocker's classics.


Ingredients:
1/2 cup sugar
1 1/2 T cornstarch
3 cups peaches (5-6 medium blanched peaches)
1 cup raspberries (6 oz. tub)
1 teaspoon lemon juice
3 T shortening
1 cup all-purpose flour
1 T sugar
1 1/2 teaspoons baking powder
1/2 teaspoon salt
1/2 cup milk

Directions:
Heat oven to 400 degrees. Peel and cut up blanched peaches. Set aside. Mix 1/2 cup sugar and the cornstarch in 2-quart saucepan. Stir in peaches, raspberries and lemon juice. Cook, stirring constantly, until mixture thickens and boils. Boil and stir 1 minute. Pour into ungreased 1-quart casserole; keep peach mixture hot in oven.

Cut shortening into flour, 1 T sugar, the baking powder and salt until mixture resembles fine crumbs. Stir in milk. Drop dough by 6 spoonfuls onto hot peach mixture.

Bake until topping is golden brown, 25 to 30 minutes. Serve warm and, if desired, with whipped cream or vanilla ice cream. Makes 6 servings.